
A portal is one public help site. Most businesses need one; create more when you run separate brands.
Create the portal
- Open Help Center in the sidebar. If you have no portal yet, click Create Portal; otherwise open the portal name at the top of the page and choose Create new portal.
- Enter a Name, such as Acme Help, and a Slug, the short name used in the address, such as acme. The portal is then published at chat.sapot.ai/hc/acme.
- Click Create.
The portal starts in English with no categories or articles. Add categories next, then write your first article.
Make it look like your business
Open Help Center → Settings for the portal.
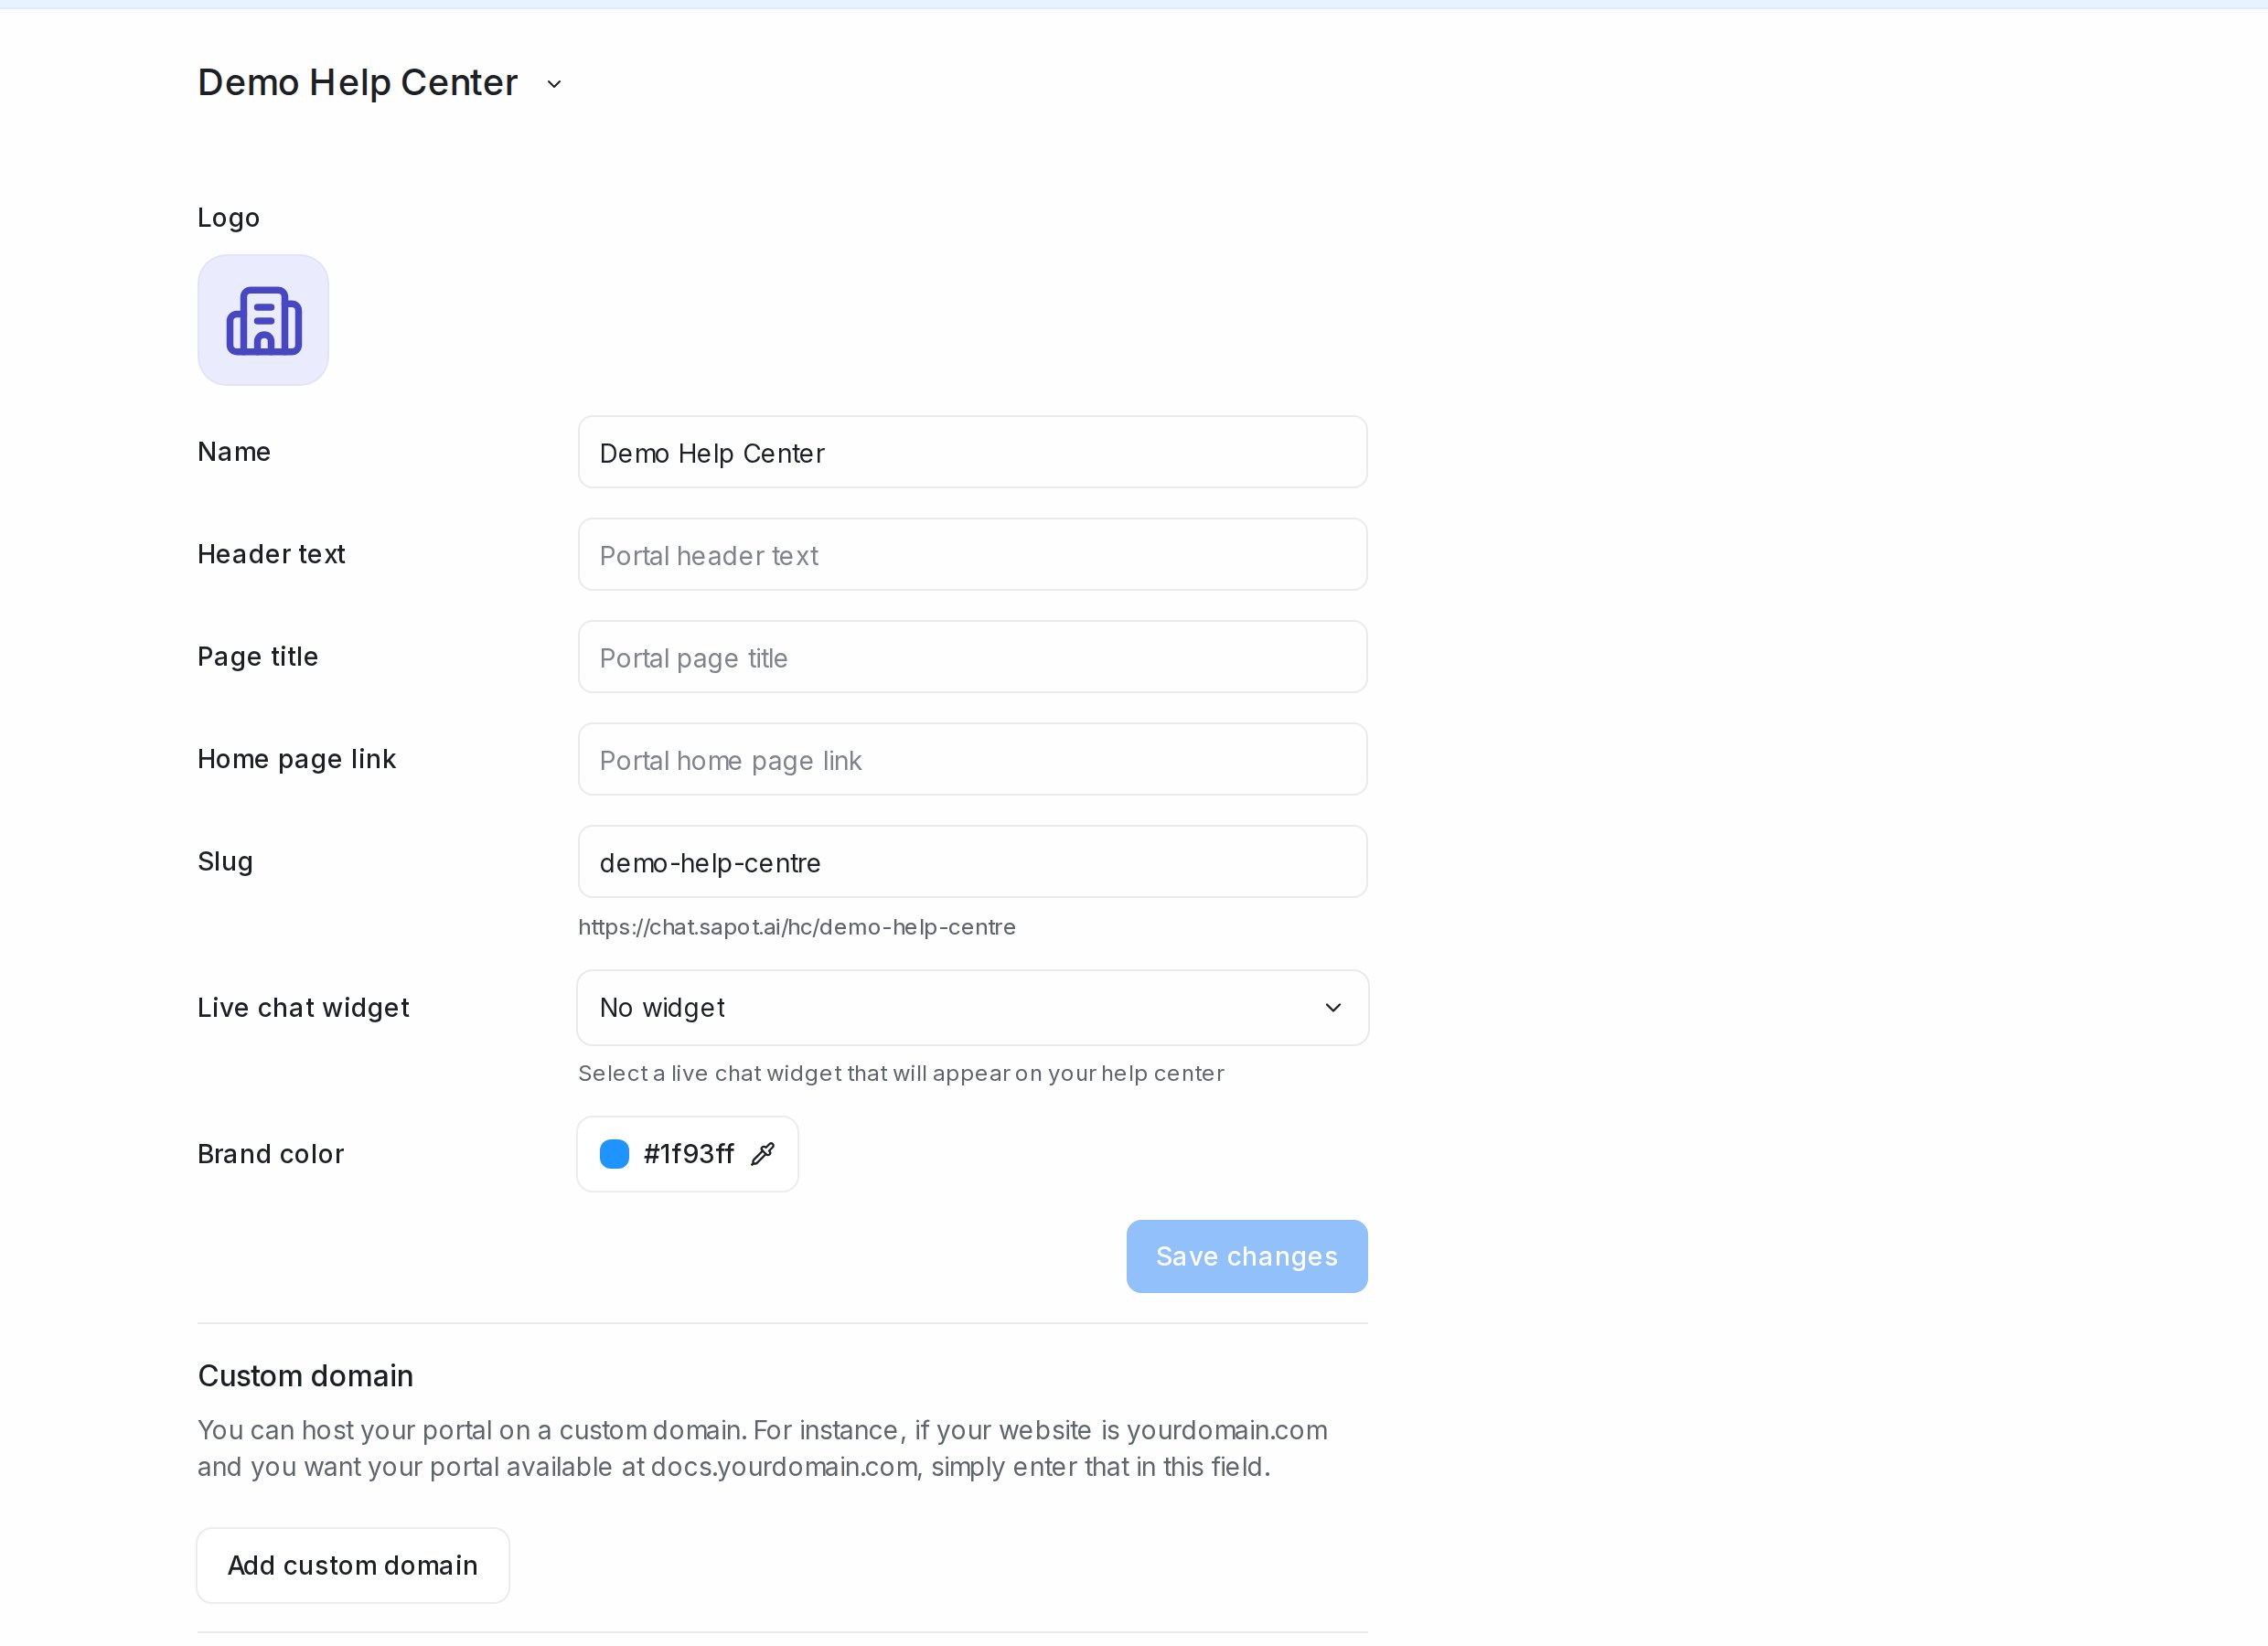
- Logo: shown in the portal header.
- Name: the portal’s name inside the dashboard.
- Header text: the headline on the portal home page, for example How can we help?
- Page title: the title shown in the browser tab and in search results.
- Home page link: where the portal’s logo links back to, usually your website.
- Slug: the address of the portal; the full link is shown underneath.
- Live chat widget: pick one of your website inboxes to show its chat bubble on every portal page, or No widget.
- Brand color: the colour of links and buttons.
Click Save changes. The rest of the page, custom domain, layout and deleting a portal, is covered in Locales and portal settings.