
Connecting a website live chat inbox
A Website inbox puts a chat bubble on your site. Visitors write in the widget, their messages arrive as conversations in Mampu AI, and your team or your AI agent replies from there.
1. Add a Website inbox
Go to Settings → Inboxes → Add Inbox and choose Website. The setup runs in four steps: Choose Channel, Create Inbox, Add Agents, Voilà!
2. Fill in the channel
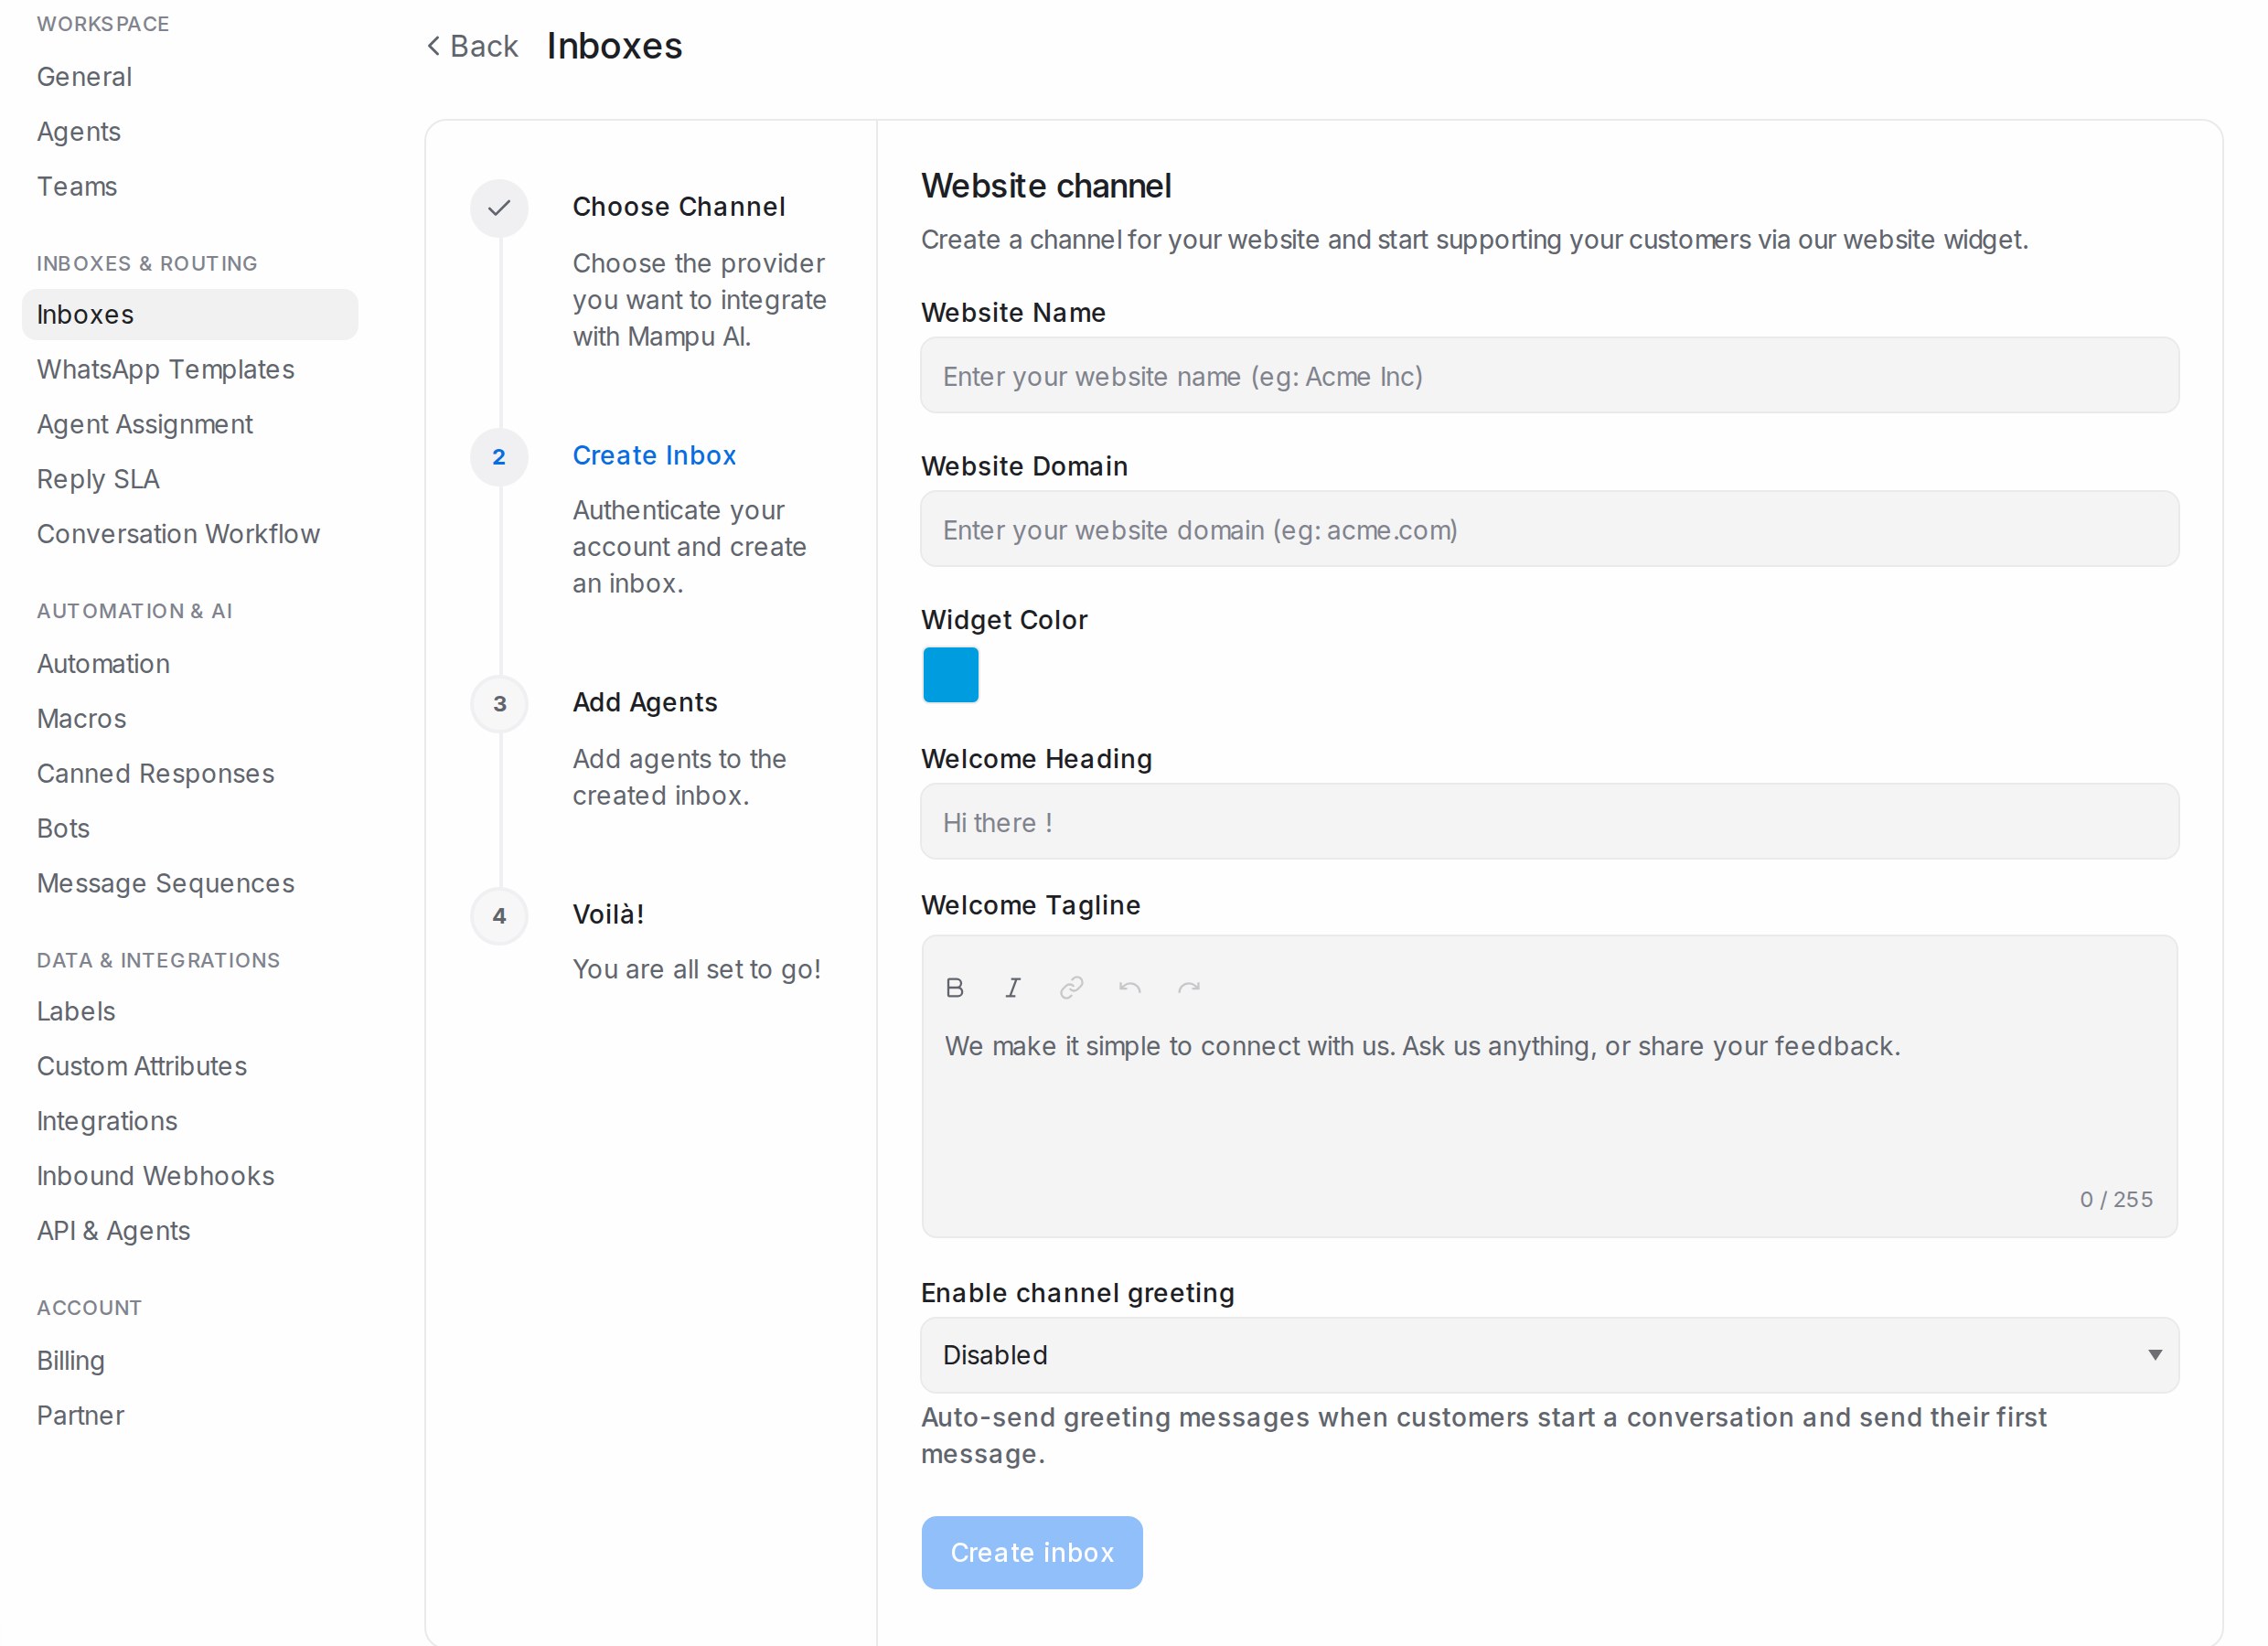
- Website Name: the name shown at the top of the widget.
- Website Domain: the site the widget lives on, for example acme.com.
- Widget Color: the colour of the bubble and header.
- Welcome Heading and Welcome Tagline: the greeting a visitor sees before they type.
- Enable channel greeting: set to Enabled to send a Channel greeting message automatically when a visitor sends their first message.
Click Create inbox.
3. Add agents
Under Pick agents for the inbox, choose the teammates who will answer website chats, then Add agents. You can change this later on the inbox’s Collaborators tab.
4. Install the widget
The Voilà! step shows a short script. Copy it and paste it just before the closing </body> tag on every page where you want the bubble. The bubble appears as soon as the page reloads. Take me there opens the inbox; More settings opens its settings page.
After the inbox is live
Open the inbox’s settings (Settings → Inboxes, settings icon):
| Tab | What to set for live chat |
|---|---|
| Settings | Set Reply time, Widget features, Help Center, Enable email collect box, Enable conversation continuity via email |
| Pre Chat Form | Ask for a name, email or your own fields first |
| Business Hours | Your hours and the Unavailable message for visitors |
| Configuration | Allowed Domains, Enable widget in mobile apps, Identity Validation |
Every switch is explained in Inbox settings, tab by tab.