
- Canned responses save text you type again and again.
- Macros save actions you take again and again.
- Bots hand first replies to your own software.
Watch the walkthrough
Canned responses
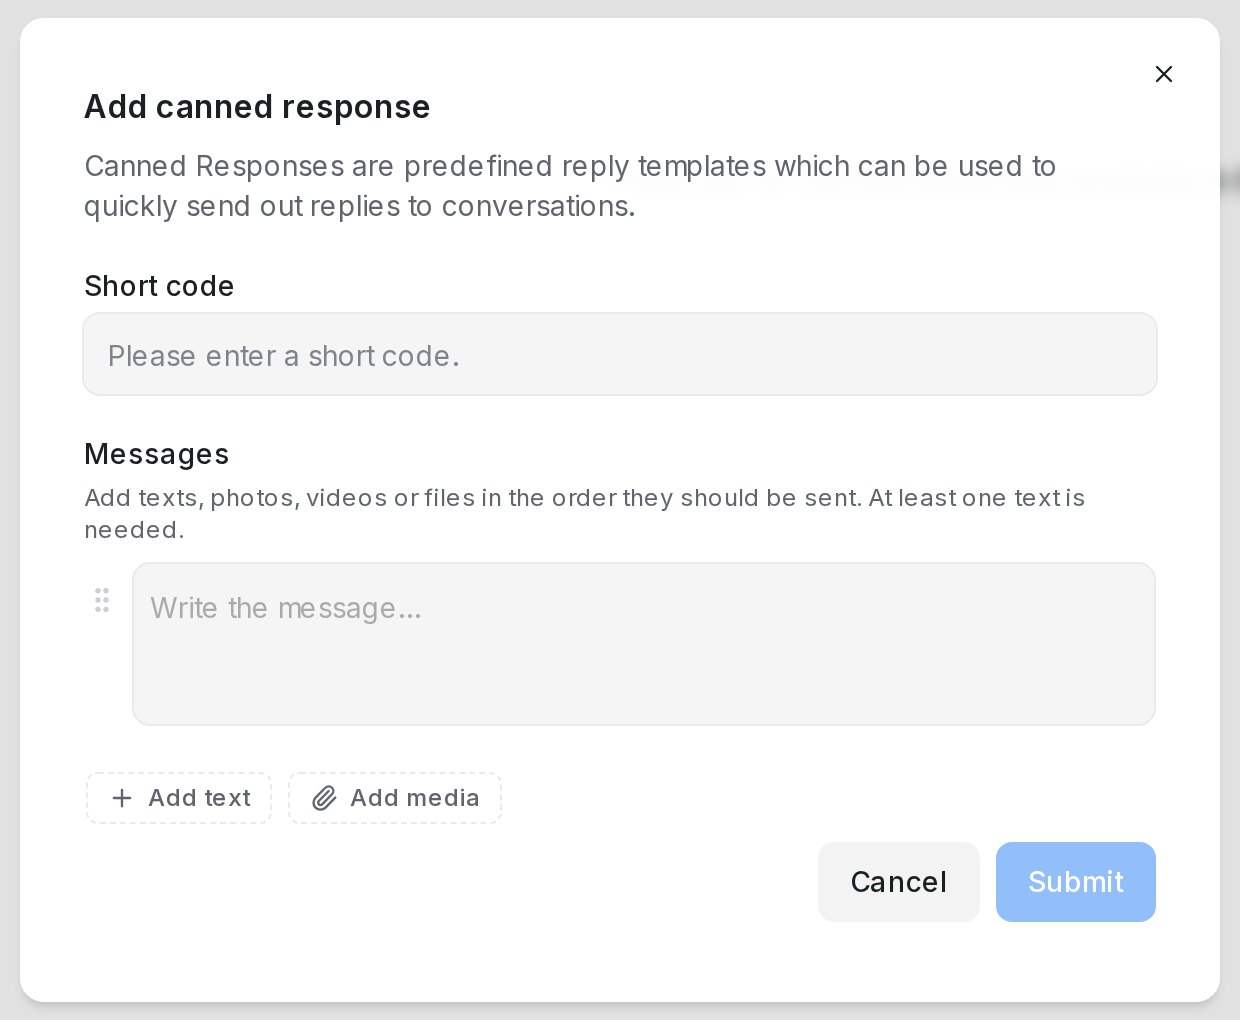
- Open Settings → Canned Responses and click Add canned response.
- Enter a Short code, such as opening-hours.
- Under Messages, write the reply. Add text adds another message and Add media adds a photo, video, audio clip or document. Drag the handle to reorder; × removes a row. At least one text is needed.
- Click Submit.
Texts can use variables such as the contact’s name, filled in when the reply goes out. Canned responses are shared across the account; each has Edit and Delete.
Sending one
Type / and the short code in the reply box, then pick the response.
| The response holds | What happens |
|---|---|
| One text | It is pasted into the reply box to edit before sending |
| Several messages or a file | A card above the reply box lists them, e.g. /brochure · 4 messages. Click Send 4 messages to send them in order; × removes the card |
Outside a reply, for example in contact notes, only the texts are pasted. A file over a channel’s size limit is refused when you add it. If a file was later removed, the reply is not sent and you are asked to edit the response.
Macros
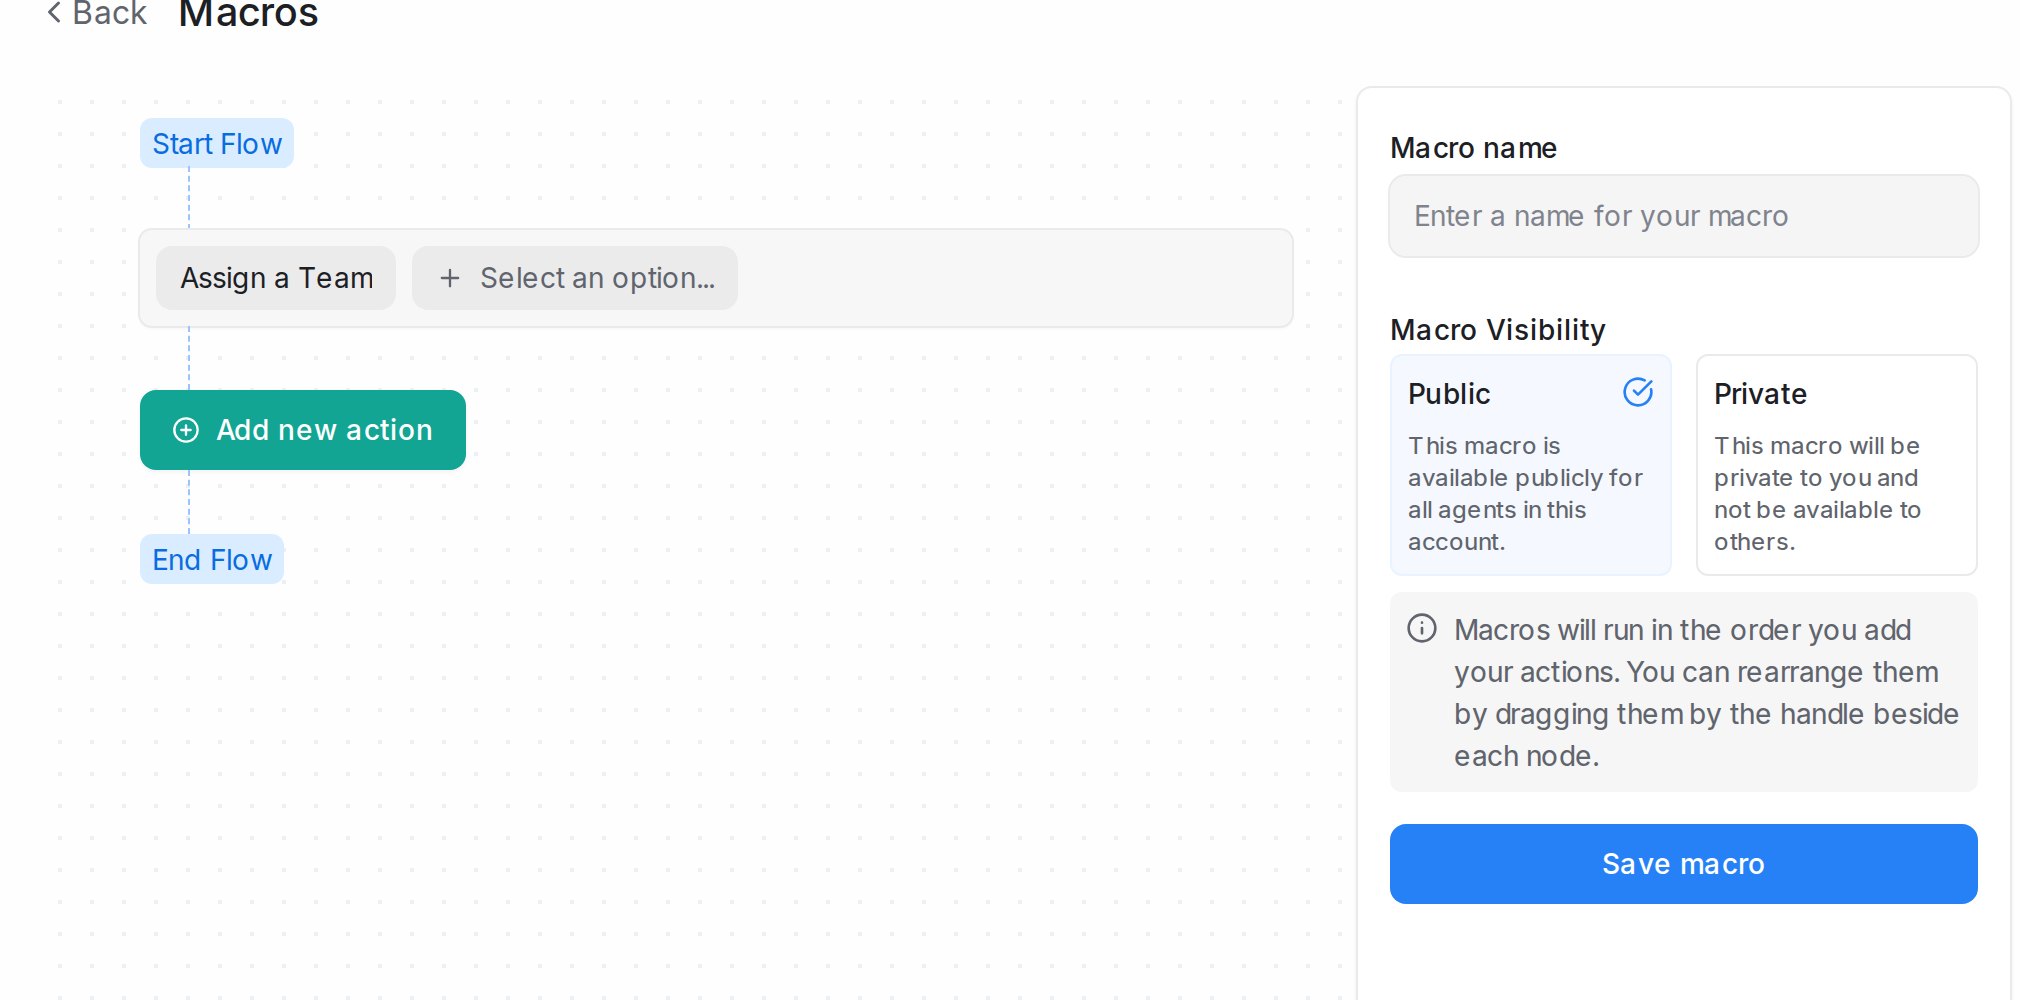
- Open Settings → Macros and click Add a new macro.
- Enter a Macro name.
- Click Add new action for each step, in order. Drag steps to reorder; Delete Action removes one.
- Pick Macro Visibility: Public for all agents (administrators only) or Private for you.
- Click Save macro.
Actions: Assign a Team, Assign an Agent, Add a Label, Remove a Label, Remove Assigned Agent, Remove Assigned Team, Send a Message, Add a Private Note, Send Attachment, Send an Email Transcript, Change Priority, Snooze Conversation, Mute Conversation, Resolve Conversation, Send Webhook Event.
To run one, open a conversation, expand Macros in the details panel and click Execute; Preview Macro shows the steps first. For actions that should run on their own, use automation rules; see Labels, attributes and automation.
Bots
A webhook bot is software you run yourself: it receives conversation events and replies through the developer API.
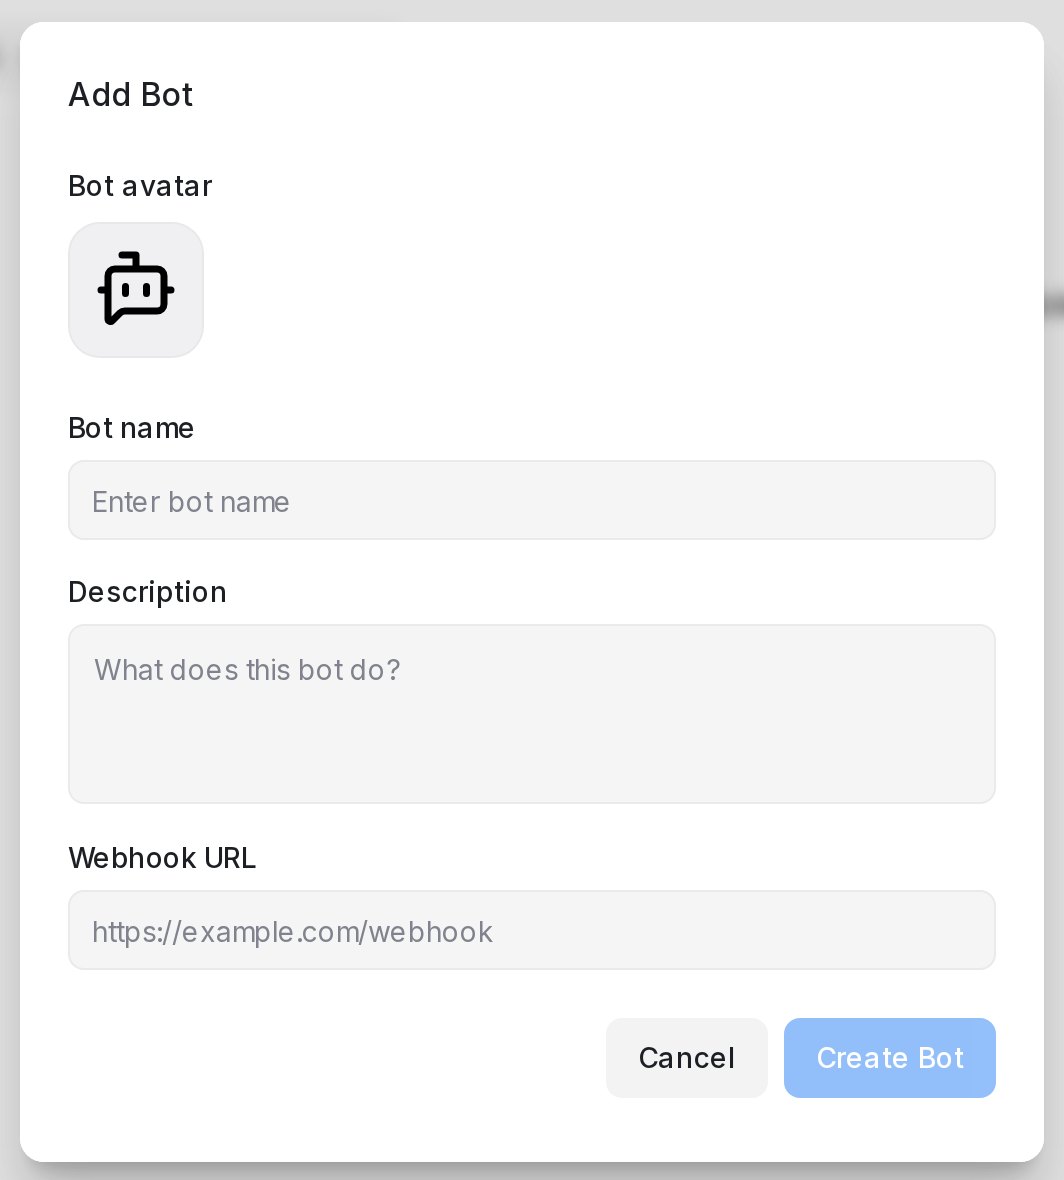
- Open Settings → Bots and click Add Bot.
- Enter the Bot name, Description and Webhook URL, and optionally a Bot avatar.
- Click Create Bot, then copy the Webhook Secret (to verify events) and Access Token (to reply). Both stay in the bot’s settings.
- Connect the bot under the inbox’s Bot Configuration tab; see Inbox settings, tab by tab.
Developer details are at developers.sapot.ai. For AI replies without code, use a flow agent; see Creating a Flow Agent.